Macramé for Beginners: Your First Wall Hanging
I remember sitting in a tiny, cramped studio apartment in NYC after a grueling double shift in a Michelin-starred kitchen, staring at a tangled mess of cotton cord and feeling completely defeated. Everyone tells you that starting a new craft is supposed to be “relaxing,” but let’s be real: when your knots look more like a bird’s nest than a plant hanger, it’s incredibly frustrating. I quickly learned that the secret to macrame for beginners isn’t about having “natural talent” or expensive tools; it’s about understanding the rhythm of the tension, much like finding the perfect balance of acidity in a reduction sauce.
In this guide, I’m stripping away the fluff and the intimidating jargon to give you a straight-shooting roadmap to success. We aren’t going to get bogged down in complex patterns that require a PhD in geometry; instead, I’ll walk you through the essential knots and foundational techniques that actually matter. You’ll learn how to set up your workspace, choose the right cord, and—most importantly—how to embrace the mistakes that make your creations uniquely yours. Let’s turn those tangled strings into something truly beautiful.
Table of Contents
- Step-by-Step Instructions
- Sourcing Your Canvas Choosing Macrame Cord Types for Beginners
- Mastering the Flow How to Hold Macrame Cord With Intention
- The Secret Sauce: 5 Pro-Tips to Keep Your Creativity From Boiling Over
- Bringing the Art of Macrame into Your Daily Flow
- Finding Your Rhythm in Every Knot
- Your Creative Journey Begins Now
- Frequently Asked Questions
Guide Overview
Tools & Supplies
- Scissors for clean cord cuts
- Measuring tape to determine length
- Cotton macrame cord (3mm or 4mm) 1-2 rolls
- Wooden dowel or ring 1 piece
Step-by-Step Instructions
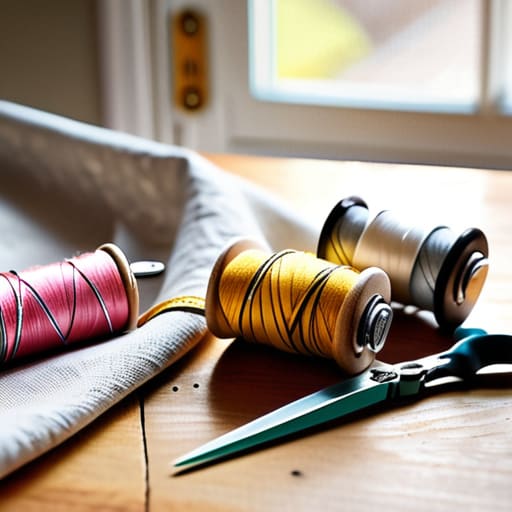
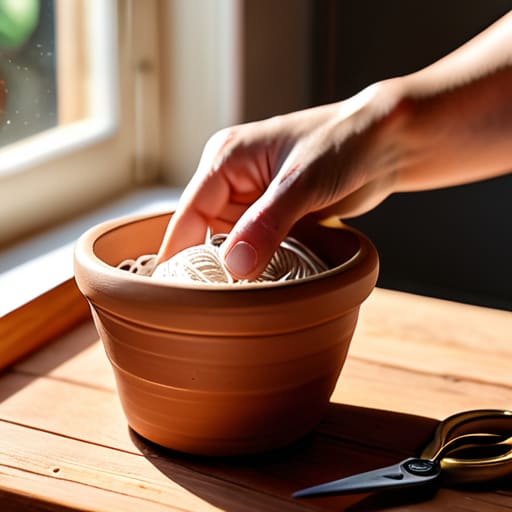
- 1. First things first, let’s talk about your “mise en place.” Just like in a professional kitchen, you can’t start cooking without your ingredients ready to go. For macrame, you’ll need some high-quality cotton cord (I personally love the 3mm or 4mm single-twist for beginners), a sturdy pair of sharp scissors, and a way to hang your work, like a wooden dowel or even a sturdy tree branch you found on a walk. Grab a piece of masking tape to secure your cord to the table—it’s a total game changer for keeping things steady while you work.
- 2. Once you’ve got your station set up, it’s time to cut your lengths. This is where most people get a little nervous, but think of it like prepping your vegetables; you want consistency. For a basic wall hanging, I recommend cutting several lengths of cord that are about four times the length of your finished project. It might feel like a lot of cord, but remember, once you start knotting, that length disappears faster than a plate of fresh appetizers at a tasting menu.
- 3. Now, let’s get those cords attached to your dowel using the Lark’s Head Knot. This is your foundational step. Fold a piece of cord in half to create a loop, place that loop over your dowel, and then pull the two loose ends through the loop. Pull it snug—but not so tight that you’re straining your wrists—and repeat this until your dowel is lined with cord. It’s all about creating a solid foundation before you start the real artistry.
- 4. Let’s dive into the star of the show: the Square Knot. This is the “mother sauce” of macrame; once you master it, you can make almost anything. Take four strands of cord. The two outer strands are your “working cords,” and the two middle ones are your “filler cords.” Cross the left cord over the middle ones to form a shape like the number four, tuck the right cord under the middle cords and up through the loop on the left. Pull it tight, then flip your hands and do the exact same thing starting from the right side. It’s a rhythmic, almost meditative process once you find your flow.
- 5. If you’re feeling a bit more adventurous, try adding some texture with the Spiral Stitch. This is actually just a series of half-square knots. Instead of alternating sides like we did in the previous step, you simply keep repeating the same side every single time. It creates a beautiful, twisting effect that looks incredibly professional but is actually surprisingly simple to execute. It’s like adding a little garnish to a dish—it takes something basic and makes it pop!
- 6. As you work your way down, don’t be afraid to experiment with the tension. In a kitchen, we talk about “seasoning to taste,” and macrame is no different. If your knots feel too loose or look a bit wonky, just take a breath and adjust your grip. You aren’t aiming for factory perfection; you’re aiming for something that feels soulful and handmade. If a knot goes sideways, just untie it and try again—it’s not a ruined dish, it’s just a learning curve.
- 7. Finally, it’s time for the most satisfying part: the fringe. Once you’ve finished your pattern, use your sharp scissors to trim the ends of your cords. You can go for a clean, blunt horizontal line for a modern look, or use your scissors to fringe the edges for a more bohemian, whimsical vibe. This is your moment to sign your work and step back to see the beautiful, tactile piece of art you’ve just brought into the world.
Sourcing Your Canvas Choosing Macrame Cord Types for Beginners

Now, let’s talk about the “ingredients” of your project. Just like choosing between a high-quality fleur de sel and a basic table salt, the type of cord you pick will completely change the “flavor” of your finished piece. When you’re first starting out, I highly recommend sticking to cotton cord—specifically single-twist or braided varieties. It’s forgiving, easy on the hands, and holds those foundational shapes beautifully. If you’re diving into your first square knot tutorial, a 3mm or 4mm cotton cord provides that perfect balance of structure and softness without being too overwhelming to manage.
Don’t feel like you need a professional pantry of supplies right away, but do keep an eye on texture. While synthetic cords might look shiny and fancy, they can be slippery and frustrating when you’re still mastering how to hold macrame cord steady. I always tell my clients that simplicity is your best friend in the beginning. Focus on finding a natural, matte cotton that feels good to touch; it makes the process feel less like a chore and more like a meditative escape.
Mastering the Flow How to Hold Macrame Cord With Intention

Now, let’s talk about something that sounds a little technical but is actually the secret sauce to a beautiful piece: your tension. When I was in the kitchen, if my knife grip was off, my prep work suffered; macrame is exactly the same. Learning how to hold macrame cord isn’t just about keeping the strings from slipping; it’s about finding a rhythm that allows your hands to work in harmony. You want to hold the working cords with a firm but gentle grip, ensuring that every time you move through a square knot tutorial, your tension remains consistent. If you pull too hard on one side, your beautiful wall hanging will end up looking a bit wonky and lopsided.
Think of your hands as the conductors of an orchestra. You aren’t just pulling string; you are shaping the energy of the piece. I always tell my students to take a breath and find a steady, comfortable stance before diving into more complex beginner macrame patterns. If you find your hands cramping, it’s a sign you’re gripping too tightly. Relax those shoulders, find your flow, and let the cord move with intentional grace.
The Secret Sauce: 5 Pro-Tips to Keep Your Creativity From Boiling Over
- Don’t fear the fray. Just like a sauce that breaks or a dough that won’t rise, your first few knots might look a little wonky. Embrace the mess! Every tangled cord is just a lesson in disguise, and honestly, it’s all part of the process.
- Consistency is your best friend. Think of it like seasoning a dish—you want even distribution. Try to keep your tension steady; if you pull too hard on one knot and too loose on the next, your beautiful wall hanging will end up looking more like a crooked smile than a piece of art.
- Set the stage for success. I can’t stress this enough: find a stable workspace. You need a sturdy dowel or a stand that won’t budge. Trying to knot while your “canvas” is wobbling is like trying to julienne carrots on a moving bus—it’s a recipe for frustration!
- Work in small bites. Don’t try to tackle a massive, floor-to-ceiling tapestry on your very first go. Start with something small and manageable, like a simple keychain or a mini plant hanger. It’s much more rewarding to finish a “small plate” than to stare at a giant, unfinished project.
- Curate your vibe. Macrame is a tactile, rhythmic art form. Put on a great playlist, grab a cup of tea, and really settle into the flow. When you approach your craft with intention rather than rushing to the finish line, the magic really starts to happen.
Bringing the Art of Macrame into Your Daily Flow
Don’t sweat the imperfections; just like a perfectly seasoned sauce, your knots will find their rhythm with practice and a little patience.
Invest in quality cord from the start to ensure your creative journey feels as smooth and tactile as it looks.
Treat every knot as a moment of mindfulness, turning a simple craft into a way to ground yourself and express your unique creative flavor.
Finding Your Rhythm in Every Knot
“Just like mastering a complex reduction or perfecting a delicate souffle, macrame isn’t about getting every knot perfect on the first try; it’s about finding your rhythm, embracing the tangles, and realizing that every single cord you weave is a way to braid your own creativity into the world.”
Amelia Johnson
Your Creative Journey Begins Now

We’ve covered a lot of ground together, from selecting that perfect, tactile cord to finding your rhythm and holding your materials with intention. Remember, mastering macrame isn’t about achieving immediate perfection; it’s about understanding how different textures react to your hands and how each knot builds upon the last. Whether you’re working with a sturdy cotton rope or a delicate jute, the goal is to build a foundation that allows your unique style to emerge. As you move forward, keep experimenting with your tension and don’t be afraid to make a few mistakes along the way—that’s often where the most interesting patterns are born.
Just like a chef perfecting a signature sauce, your skill in macrame will come through patience and a lot of soulful repetition. I know it can feel a bit intimidating when you first look at a tangled mess of string, but I promise you, there is so much magic in the process of creation. Don’t let the fear of a messy knot stop you from starting. Take a deep breath, find your flow, and remember that every single piece you make is a beautiful reflection of your own creativity. Now, go out there and weave something wonderful!
Frequently Asked Questions
I've got my cord and my knots down, but how do I actually stop my project from looking like a tangled mess once I'm finished?
Taming the Fringe: How to Give Your Macrame That Professional Polish
Is it better to stick with cotton cord for everything, or are there other materials that might give my pieces a different vibe?
While cotton is my absolute go-to for that soft, bohemian feel, don’t feel like you’re stuck in a one-flavor menu! Think of cord like spices: different materials change the whole dish. If you want something edgy and modern, try jute or hemp for a rustic, earthy vibe. For a touch of luxury, even some synthetic blends can add a sleek sheen. Experimenting with textures is where your true creative signature really starts to shine!
How much space do I really need to set up a little macrame corner without it taking over my entire living room?
Honestly, you don’t need a dedicated studio to find your flow! Think of it like my spice kit—it’s all about being mobile and intentional. A cozy corner with a small side table or even a sturdy chair will do wonders. As long as you have enough room to stretch your arms without knocking over your morning latte, you’re golden. Keep it compact, keep it organized, and let your creativity breathe!


Amelia Johnson
I believe that food is not just sustenance but an expression of culture and creativity. Let’s explore how we can turn our culinary passions into rewarding careers that feed both our souls and our wallets.