How to Use a Drill: a Beginner’s Guide
I was standing in my first tiny apartment in NYC, staring at a flat-pack bookshelf and a heavy, intimidating power tool, feeling like I’d rather face a dinner rush during a holiday weekend than touch that thing. Most people think that learning how to use a drill requires some innate, mechanical genius or a garage full of expensive gadgets, but that is a total myth. Honestly? It’s much more like mastering a delicate emulsion in a pan; it’s all about finding your rhythm and understanding the tension between your hands and the tool. Once you stop treating it like a scary piece of industrial machinery and start seeing it as an extension of your own creativity, everything changes.
In this guide, I’m stripping away the technical jargon to give you the straight-up, no-nonsense basics you actually need. We aren’t going to get bogged down in engineering manuals; instead, I’ll show you how to gain the confidence to build something beautiful without the frustration. From picking the right bit to controlling that initial kick, you’ll learn the practical skills to tackle your DIY dreams with precision and soul.
Table of Contents
- Step-by-Step Instructions
- Choosing Your Tools Cordless vs Corded Drill for Your Vision
- The Perfect Blend Selecting Drill Bit Types and Uses
- The Secret Sauce: 5 Pro-Tips for a Flawless Finish
- Bringing It All Together: My Final Kitchen Secrets for Your DIY Project
- Finding Your Rhythm
- Finishing Your Masterpiece
- Frequently Asked Questions
Guide Overview
Tools & Supplies
- Power drill (cordless or corded)
- Drill bits (set of various sizes)
- Workpiece (wood, metal, or plastic)
- Safety glasses (1 pair)
Step-by-Step Instructions
- 1. First things first, you’ve got to pick your “ingredients.” Just like selecting the right knife for a delicate julienne, you need to match your drill bit to the material you’re working with. If you’re drilling into wood, grab a brad point bit; if it’s metal, you’ll want something much hardier. Don’t just grab the first thing you see in the toolbox—prep is everything.
- 2. Once you have your bit, it’s time for the assembly. Insert the bit into the chuck (that’s the adjustable part at the front) and use the chuck key or the built-in mechanism to tighten it down. You want it to be perfectly centered and snug. If it’s even a little bit loose, you’re going to end up with a messy hole that looks more like a kitchen accident than a professional job.
- 3. Now, let’s talk about your “mise en place”—positioning. Mark your spot with a pencil, and if you really want to be a pro, use a nail or an awl to create a tiny little indentation first. This acts as a guide for your bit so it doesn’t skitter across your surface like a runaway sauté pan when you first pull the trigger.
- 4. Get into a comfortable stance. You want to hold the drill with both hands if it allows, keeping your body stable and your weight centered. It’s all about balance and control. If you’re feeling shaky, the result will be shaky too, and we definitely don’t want that kind of instability in our work.
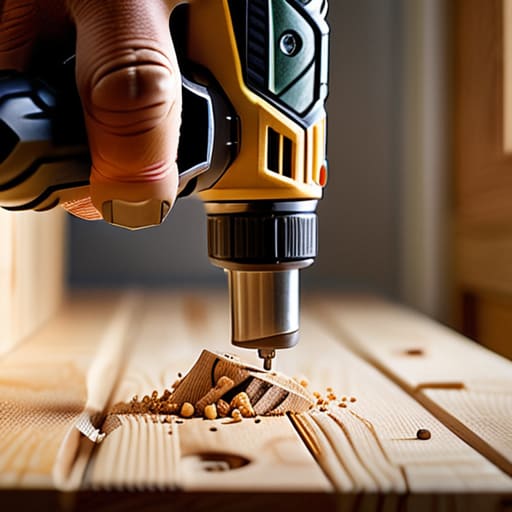
- 5. When you’re ready to go, squeeze the trigger gradually. Don’t just go full throttle immediately! Start slow to let the bit bite into the material, and once you’ve established a rhythm, you can increase the speed. It’s very much like simmering a sauce—you want to build the heat slowly rather than scorching everything right out of the gate.
- 6. Apply steady, even pressure as you work your way through. You don’t need to lean your entire body weight into it; let the tool do the heavy lifting. If you feel it struggling or getting too hot, back off for a second. Listen to the machine—it’ll tell you if you’re pushing too hard or if the bit is getting dull.
- 7. Finally, once you’ve reached the desired depth, don’t just yank the drill out! Slowly release the trigger and pull the bit out while it’s still spinning slowly. This helps prevent the material from splintering or tearing, leaving you with a clean, professional finish that you can be truly proud of.
Choosing Your Tools Cordless vs Corded Drill for Your Vision

Think of choosing between a cordless and corded drill much like choosing between a high-end chef’s knife and a versatile food processor; both are essential, but they serve very different rhythms in the kitchen. If you’re planning a massive project where you’ll be moving around a lot—maybe building custom shelving for your spice collection—a cordless vs corded drill debate usually settles itself in favor of mobility. Cordless models give you that freedom to wander without tripping over a tether, though you do have to keep an eye on your battery life, much like watching a delicate reduction so it doesn’t run dry.
On the other hand, if you are tackling a heavy-duty marathon project, a corded drill provides that steady, unrelenting power that batteries sometimes struggle to maintain. When you’re drilling into wood and metal, that consistent current ensures you won’t lose momentum halfway through a crucial cut. It’s all about matching the tool to the intensity of your vision. Just make sure you’ve mastered your safety precautions for power tools before you dive in; even the most seasoned pro knows that a little respect for your equipment is what keeps the creativity flowing smoothly.
The Perfect Blend Selecting Drill Bit Types and Uses

Think of your drill bits like your kitchen knives; you wouldn’t try to slice a delicate heirloom tomato with a heavy-duty cleaver, right? Just like in a professional kitchen, using the wrong tool for the job is a recipe for disaster. Understanding different drill bit types and uses is the secret to a clean, professional finish. If you’re working on a rustic wooden shelf, a brad point bit will give you that precise, splinter-free entry. However, if you’re tackling a more industrial project, you’ll want to switch to a high-speed steel bit specifically designed for drilling into wood and metal to ensure you don’t dull your equipment prematurely.
Once you’ve picked your bit, don’t forget about the “seasoning” of your tool—the settings! I always tell my clients that precision is everything. Before you pull the trigger, take a second to practice adjusting drill torque settings to match the resistance of your material. It’s a bit like adjusting the flame on a sauté pan; you want just enough power to get the job done without blowing things out of proportion. Take your time, trust your hands, and you’ll be amazed at what you can build.
The Secret Sauce: 5 Pro-Tips for a Flawless Finish
- Mark your territory first! Just like you wouldn’t start a reduction without tasting it, never start drilling without a clear, pre-marked spot. Use a pencil or a center punch to ensure you aren’t wandering aimlessly across your workpiece.
- Steady hands, steady heart. It’s all about the rhythm. Apply consistent, gentle pressure rather than leaning your entire body weight into it. Think of it like kneading dough—too much aggression and you’ll ruin the texture; too little and you’ll never get anywhere.
- Mind your speed settings. Using a high-speed setting on a delicate piece of wood is a recipe for disaster, much like using a blowtorch to caramelize a single sugar cube. Match your drill’s RPM to the material for that perfect, clean entry.
- Let the tool do the heavy lifting. If you find yourself sweating and struggling to force the bit through, stop! You’re likely using the wrong bit or pushing too hard. A good drill should glide through the material with a satisfying, controlled hum.
- Safety is the most important ingredient. I know, I know—it’s not as glamorous as a perfectly plated scallop, but wearing your eye protection is non-negotiable. You can’t enjoy the culinary (or DIY) arts if you’re nursing a trip to the ER!
Bringing It All Together: My Final Kitchen Secrets for Your DIY Project
Think of your drill like a chef’s knife; it’s not about how expensive the tool is, but how well you understand its edge and how much respect you give the material you’re working with.
Don’t be afraid to make a little mess or even a mistake—just like a sauce that needs a bit more salt, most DIY hiccups are just opportunities to adjust your technique and learn something new.
Always match your “ingredients” to your task, ensuring your drill bit and power source are perfectly in sync so you can create something beautiful without the burnout.
Finding Your Rhythm
Using a drill is a lot like mastering a delicate reduction on a stovetop; it’s not just about the power you apply, but about feeling the resistance, finding your rhythm, and knowing exactly when to lean in to create something lasting.
Amelia Johnson
Finishing Your Masterpiece

At the end of the day, mastering a drill is a lot like perfecting a signature sauce; it’s all about understanding your ingredients and having the right technique. We’ve covered the essentials, from picking between the freedom of a cordless model to the raw power of a corded one, and ensuring you have the exact bit for the job at hand. Remember, it isn’t just about making a hole in a piece of wood; it’s about the precision and the preparation that goes into every single movement. When you respect your tools and take the time to get the fundamentals right, you’re setting yourself up for success rather than a messy kitchen—or in this case, a messy workshop.
I know that stepping up to a power tool can feel a bit intimidating at first, much like walking into a high-pressure professional kitchen for the very first time. But just like my grandmother used to say back in Vermont, you can’t learn to cook without getting a little flour on your apron, and you can’t learn to build without a few mistakes along the way. Don’t be afraid to fail, to adjust your grip, or to start over. Every project is a chance to refine your craft and build something that lasts. So, grab your gear, trust your instincts, and go create something truly beautiful!
Frequently Asked Questions
How do I know if I'm applying too much pressure and risking a slip?
Think of it like whisking a delicate hollandaise—if you go too heavy-handed, things get messy fast! You’ll know you’re overdoing it if you feel the drill vibrating aggressively in your hands or if the bit starts “skating” across the surface instead of biting in. If you’re leaning your whole body weight into it, stop! Let the tool do the heavy lifting. A steady, light touch is the secret to precision.
What’s the best way to keep my drill bits sharp and ready for my next project?
Think of your drill bits like your favorite chef’s knife—if they’re dull, you’re just fighting the material instead of working with it. To keep them sharp, don’t let them get overheated; if things get too hot, you’re cooking the temper right out of the steel! I like to use a dedicated sharpening jig for precision, and always wipe them down with a bit of oil after use to prevent rust. Keep them clean, keep them oiled, and they’ll never let you down.
Is there a trick to making sure my holes are perfectly straight every single time?
Think of it like plating a delicate sauce—if your foundation is off, the whole dish feels crooked! To keep those holes perfectly straight, I always swear by a drill guide or a simple piece of scrap wood with a hole pre-drilled in it to act as a stabilizer. Most importantly, let the tool do the heavy lifting. Don’t force it; just maintain steady, even pressure and keep your body aligned with the drill’s axis.


Amelia Johnson
I believe that food is not just sustenance but an expression of culture and creativity. Let’s explore how we can turn our culinary passions into rewarding careers that feed both our souls and our wallets.