How to Patch Jeans So They Look Better Than New
I was standing in a bustling night market in Bangkok, elbow-deep in some incredible spicy noodles, when I felt that dreaded, cold draft against my thigh. I looked down to see a gaping hole in my favorite vintage denim, right where the fabric had finally given up the ghost. In that moment, I realized that most people think a rip means the end of the road, but I’ve learned that knowing how to patch jeans is actually a lot like perfecting a reduction sauce—it requires patience, the right tools, and a little bit of creative intuition. Instead of tossing your favorites into a landfill, you can treat those repairs as a way to add character and history to your wardrobe.
In this guide, I’m stripping away all the complicated sewing jargon to give you the straight-up, practical methods I use to breathe life back into my own clothes. We aren’t just going to hide the damage; we’re going to celebrate it. I’ll walk you through everything from the invisible “fix-it” approach to bold, decorative styles that make your denim look intentionally unique. Whether you’re a total novice or just looking for a more sustainable way to shop, let’s get crafting!
Table of Contents
- Step-by-Step Instructions
- Mastering Visible Mending Techniques for Artistic Denim
- Transforming Denim Fabric Scraps Into Wearable Art
- Amelia’s Secret Sauce for Flawless Patches
- Bringing It All Together: My Final Kitchen Secrets for Your Denim
- ## The Flavor of a Well-Loved Garment
- Serving Up Your New Look
- Frequently Asked Questions
Guide Overview
Tools & Supplies
- Fabric scissors for cutting patches and excess denim
- Needle for hand sewing or sewing machine for speed
- Thimble to protect finger during heavy stitching
- Patch fabric (denim or cotton scrap) 1 piece
- Thread (matching or contrasting color) 1 spool
Step-by-Step Instructions
- 1. First things first, you need to gather your “mise en place.” Just like prepping your station before a dinner service, you don’t want to be hunting for a needle mid-stitch. Grab a sturdy sewing needle, some high-quality denim thread (or even some embroidery floss if you’re feeling fancy), a pair of sharp fabric scissors, and your patch material. I personally love using vintage scraps or even an old flannel shirt to give the repair some extra character.
- 2. Once you have your ingredients ready, take a close look at the “damage” you’re working with. Trim away any loose, fraying threads around the hole to create a clean perimeter. Think of this like cleaning up your workspace—it makes everything much more manageable. If the hole is particularly large, you might want to cut a piece of stabilizer fabric to place underneath, which acts like a sturdy base for your culinary creation.
- 3. Now, it’s time to position your patch. Lay your fabric scrap over the hole, making sure it extends at least an inch beyond the edges of the tear in every direction. You want plenty of overlap to ensure the patch stays secure through all the wear and tear of daily life. Use a few safety pins to hold it in place so you aren’t fighting the fabric while you try to sew.
- 4. Grab your needle and start with a simple running stitch or a more robust whip stitch around the very edge of the patch. This is essentially your “searing” phase—it sets the foundation and keeps everything from shifting. Keep your stitches tight and consistent to prevent the patch from puckering, which can happen if you pull too hard or leave too much slack.
- 5. If you want that beautiful, textured look that makes a repair look intentional rather than accidental, try some decorative stitching across the center of the patch. You can do straight lines, zig-zags, or even some whimsical embroidery. This is where you really let your creative soul shine through, turning a simple fix into a unique design element that tells a story.
- 6. Once you’ve covered the area to your satisfaction, it’s time to tie off your work. Make sure your knots are secure by weaving the thread back through the existing stitches a couple of times. A loose knot is like an underseasoned dish—it just won’t hold up when things get heated. Snip off the excess thread, and you’re officially done!
- 7. Finally, give your jeans a little “taste test” by putting them on and moving around. Check to see if the patch feels comfortable and if the tension is right. If it feels a bit stiff, don’t worry—just like a new cast-iron skillet, it will soften up beautifully after a few washes and a bit of real-world use.
Mastering Visible Mending Techniques for Artistic Denim

Now, if you’re like me and you see a hole in your favorite pair of Levi’s not as a disaster, but as a blank canvas, then it’s time to dive into the world of visible mending techniques. Instead of trying to hide the damage, I love to lean into it! Think of it like garnishing a dish—you aren’t just covering up a flaw; you’re adding a signature touch that makes the whole thing pop. You can grab some colorful denim fabric scraps from an old pair of jacket or even some vintage patterned cloth to create a beautiful contrast against the indigo.
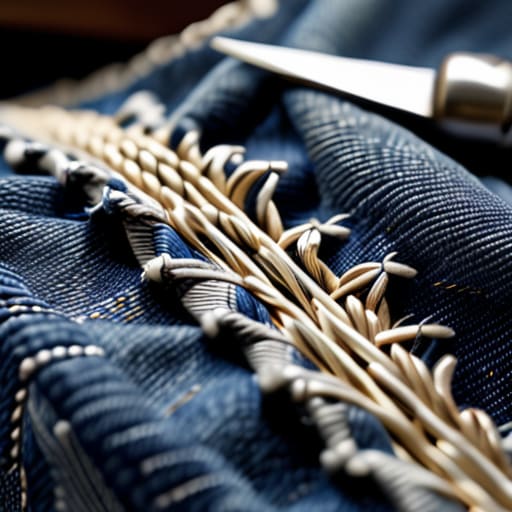
When you’re ready to get hands-on, don’t just settle for a basic fix. I highly recommend experimenting with a darning stitch tutorial to create intricate, woven patterns directly over the worn areas. Using a heavy-duty sewing needle and thread for denim is essential here to ensure your art actually holds up to the rigors of daily life. Whether you’re going for a rustic, textured look or something more geometric, remember that there are no mistakes in creativity—only unique culinary expressions for your wardrobe.
Transforming Denim Fabric Scraps Into Wearable Art

Think of your leftover denim fabric scraps like the “kitchen scraps” in a professional chef’s station—they might look like waste to some, but to us, they are pure potential. Instead of just trying to hide a tear, I love using these fragments to create something entirely new and unexpected. You can layer different shades of indigo or even mix in a bit of vintage floral cotton to create a collage effect. It’s less about fixing a mistake and more about layering flavors to create a more complex, beautiful final dish.
When you’re ready to dive in, grab a sturdy sewing needle and thread for denim to ensure your new “garnish” stays put through every wash and wear. I find that using a slightly thicker thread can turn a simple repair into a deliberate design choice. Whether you’re experimenting with a messy, textured look or a more structured pattern, remember that there are no rules here. This is your canvas, and transforming your denim into wearable art is all about celebrating the history of the garment while adding your own unique, creative flair.
Amelia’s Secret Sauce for Flawless Patches
- Don’t be afraid to play with textures. Just like I’d layer different spices to create depth in a sauce, try mixing a rugged denim scrap with a soft flannel or a piece of lace. It adds a visual “flavor” to your jeans that a plain patch just can’t match.
- Prep your “mise en place” before you start sewing. There is nothing more frustrating than being mid-stitch and realizing you’re missing a needle or the right thread color. Lay out your scraps, needles, and scissors first so you can get into a creative flow without the interruptions.
- Think about the “structural integrity” of your denim. If you’re patching a high-stress area like the inner thigh or the knee, don’t just slap a thin piece of fabric on top. Use a thicker, more durable material to ensure your repair holds up through every kitchen rush or street food crawl.
- Embrace the “seasoning” of your fabric. If you’re using a brand-new scrap of denim, give it a quick wash or even a light sand with some sandpaper first. You want the patch to feel like it belongs to the garment, not like a stiff, uninvited guest.
- Let your mistakes be your signature. In a professional kitchen, sometimes a slight char on a vegetable actually enhances the dish. If your stitching isn’t perfectly straight, don’t sweat it! That’s just the “hand-crafted” charm that makes your jeans a one-of-a-kind piece of wearable art.
Bringing It All Together: My Final Kitchen Secrets for Your Denim
Don’t fear the mistakes; just like a slightly over-seasoned sauce, a messy stitch can be salvaged with a little creativity and turned into a unique design element.
Treat your denim like a precious heirloom recipe—invest the time in quality thread and thoughtful patches to ensure your favorite pieces last for years to come.
Remember that mending is a form of self-expression, so let your personality shine through your repairs and turn every hole into a conversation piece.
## The Flavor of a Well-Loved Garment
“Think of patching your favorite jeans just like seasoning a cast-iron skillet; every mend, every stitch, and every bit of character you add over time only makes the final result more soulful and uniquely yours.”
Amelia Johnson
Serving Up Your New Look

At the end of the day, patching your jeans is about so much more than just fixing a hole; it’s about honoring the history of the clothes you love. We’ve walked through everything from the foundational basics of structural repairs to the more whimsical, artistic side of visible mending and scrap transformation. Whether you chose a subtle, seamless patch to keep things classic or went full “wearable art” with bold textures and contrasting threads, you’ve successfully taken something broken and made it entirely your own. Just like a well-seasoned cast iron skillet, these jeans now have a bit more character and a lot more soul.
As I always tell my culinary clients, the most beautiful results often come from the most unexpected ingredients. The same goes for your wardrobe. Don’t be afraid to embrace the imperfections or try a technique that feels a little intimidating at first. Every stitch is a chance to practice patience and creativity, turning a potential waste pile into a personal masterpiece. So, grab your needle, find your rhythm, and remember that nothing is ever truly ruined—it’s just waiting for your unique touch to bring it back to life. Happy mending!
Frequently Asked Questions
If I'm patching my favorite pair of jeans, how can I make sure the patch doesn't feel too bulky or stiff when I'm actually wearing them?
Think of it like layering flavors in a sauce—you want depth without it becoming heavy! To avoid that “cardboard” feeling, skip the heavy-duty canvas and opt for a lightweight denim scrap or even a sturdy cotton flannel. Also, instead of a massive, thick patch, try “darning” the hole. It’s like seasoning a dish with fine spices rather than a whole jar; it fills the gap seamlessly without adding unnecessary bulk.
What kind of thread or needle should I be looking for so my repairs actually hold up after a few trips through the washing machine?
Think of your thread and needle like the foundation of a great consommé—if the base isn’t solid, the whole dish falls apart! For repairs that survive the laundry cycle, skip the flimsy craft thread. Grab some heavy-duty polyester or even a dedicated denim thread; it’s got the strength to handle the tension. Pair it with a sharp, sturdy embroidery needle or a denim needle. You want something that bites into the fabric without breaking a sweat!
I love the idea of visible mending, but how do I pick a patch fabric that looks intentional rather than just like a messy mistake?
Think of choosing a patch like balancing flavors in a new dish. You don’t want the spice to overpower the protein, but you don’t want it to disappear, either! To make it look intentional, play with contrast. If your jeans are a deep indigo, try a bold patterned cotton or a textured linen. Aim for a “planned collision”—where the colors or textures are different enough to stand out, but share a similar weight.


Amelia Johnson
I believe that food is not just sustenance but an expression of culture and creativity. Let’s explore how we can turn our culinary passions into rewarding careers that feed both our souls and our wallets.