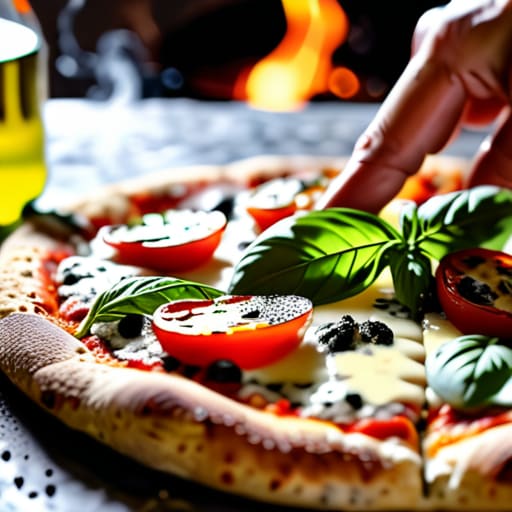
How to Make Homemade Pizza Better Than Delivery
Ever walked into a kitchen, flour dusting your nose, only to end up with a soggy, cracker-like mess that looks more like a sad biscuit than a Neapolitan dream? There is this persistent myth floating around that learning how to make homemade pizza requires a $2,000 wood-fired oven or a degree from a fancy culinary institute to get it right. I used to believe that, too, back when I was grinding through double shifts in those high-pressure NYC kitchens, thinking I needed every piece of expensive gear just to produce something decent. But honestly? The secret isn’t in the hardware; it’s in the patience and the process.
I’m not here to give you a complicated, intimidating recipe that leaves you exhausted and covered in dough. Instead, I want to share the real-world, no-nonsense techniques I’ve gathered from both professional line work and my own cozy kitchen in Vermont. We are going to dive into the soulful art of dough hydration and flavor layering so you can master how to make homemade pizza that actually feeds your soul. Let’s turn your kitchen into your own personal pizzeria, one delicious slice at a time.
Table of Contents
- Recipe Instructions
- Mastering the Best Pizza Dough Recipe and Fermentation
- Elevating Flavors With Homemade Pizza Sauce Ingredients
- Pro Chef Secrets: Small Tweaks for Massive Flavor Wins
- My Golden Rules for Pizza Perfection
- ## The Heart of the Dough
- From Your Oven to the Soul
- Frequently Asked Questions
Recipe Details
Ingredients
- 500g Type 00 flour
- 325ml Warm water
- 7g Active dry yeast
- 10g Sea salt
- 200ml San Marzano tomato sauce
- 300g Fresh buffalo mozzarella
- 4-5 Fresh basil leaves
- 1 tbsp Extra virgin olive oil
Recipe Instructions
Step 1
First things first, we need to get that dough moving. In a large mixing bowl, combine your warm water, a pinch of sugar, and your yeast. Let it sit for about five to ten minutes until it gets all foamy and beautiful—that’s how you know your yeast is alive and ready to work its magic. Once that’s happening, stir in your flour, olive oil, and a healthy pinch of salt, then knead it on a floured surface until it feels smooth and elastic to the touch.
Step 2
Now comes the part that requires a little bit of patience, which I know can be tough when your stomach is growling! Place your dough in a lightly oiled bowl, cover it with a damp cloth, and let it rise in a warm spot. You’re looking for it to double in size, which usually takes about an hour. This resting period is crucial because it develops those complex flavors that separate a mediocre crust from a professional-grade one.
Step 3
While your dough is doing its thing, let’s prep the oven. Crank that heat up as high as your oven will go—we’re talking 475°F to 500°F. If you happen to own a pizza stone, get it in there now! You want that surface to be scorching hot before the dough even touches it. This mimics those high-heat commercial ovens I used to work in back in NYC and ensures you get that perfectly crisp bottom.
Step 4
Once the dough has risen, punch it down gently and stretch it out onto a piece of parchment paper or a floured baking sheet. I always tell my clients: don’t use a rolling pin if you can help it! Using your hands to gently stretch the dough preserves those lovely air bubbles, giving you a crust that is light and airy rather than dense and heavy.
Step 5
Now for the fun part—the toppings! Spread a thin layer of your favorite tomato sauce, leaving a little room around the edges for the crust to rise. Sprinkle on your fresh mozzarella and whatever other ingredients your heart desires. Just a pro tip from my consulting days: less is more when it comes to toppings. If you pile it too high, you’ll end up with a soggy middle instead of that dreamy, cheesy perfection we’re all after.
Step 6
Slide your masterpiece into the oven and bake it until the crust is golden brown and the cheese is bubbling with those gorgeous toasted spots. It usually takes about 10 to 15 minutes, but keep a close eye on it! Once it’s out, let it sit for just a minute before slicing. If you’re feeling adventurous like I am, grab that little spice kit from my purse and hit it with a pinch of dried oregano or red pepper flakes to really make those flavors pop.
Mastering the Best Pizza Dough Recipe and Fermentation

Now, let’s talk about the real magic: the science behind that perfect chew. Finding the best pizza dough recipe is one thing, but understanding how it evolves is where you truly become a chef. I always tell my clients that patience is your most important ingredient. While you might be tempted to rush the process, true flavor develops during the resting period. If you have the time, try a cold ferment in the fridge for 24 to 48 hours; this is one of my favorite yeast dough fermentation tips because it breaks down starches into complex sugars, giving you a crust that is both airy and deeply flavorful.
When you’re actually ready to get cooking, remember that baking pizza in a home oven can be a bit of a challenge since we don’t have those massive wood-fired ovens. To mimic that professional heat, I highly recommend using a preheated pizza stone or steel. This is the secret to mastering crispy pizza crust techniques right in your own kitchen. It ensures the bottom gets that beautiful char without turning the dough into a cracker, creating that perfect balance of a soft interior and a crunchy exterior.
Elevating Flavors With Homemade Pizza Sauce Ingredients
Now that we’ve nailed that beautiful dough, let’s talk about the soul of the pie: the sauce. While it’s tempting to grab a jar from the pantry, the real magic happens when you play with your homemade pizza sauce ingredients. In my years working in NYC kitchens, I learned that the best sauces aren’t always cooked; they’re often just a bright, fresh assembly of San Marzano tomatoes, sea salt, and a splash of extra virgin olive oil. If you prefer a deeper, more complex profile, a slow simmer with fresh basil and a pinch of dried oregano can transform your kitchen into a little slice of Naples.
Don’t be afraid to experiment with different flavor profiles to keep things exciting! If you’re leaning toward something more gourmet, try adding a hint of garlic confit or even a tiny pinch of red pepper flakes—I always keep my little spice kit handy for exactly this reason. Once you have your sauce perfected, it becomes the perfect canvas for various easy pizza toppings ideas, ranging from classic buffalo mozzarella to spicy salami. Remember, the sauce should enhance your toppings, not drown them out!
Pro Chef Secrets: Small Tweaks for Massive Flavor Wins

- Don’t be afraid of the heat! If you aren’t using a pizza stone or a heavy baking steel, your crust might end up more “bread-like” than crispy. I always recommend preheating your stone for at least forty-five minutes—it’s the difference between a soggy base and that professional, bubbly char we all crave.
- Less is truly more when it comes to toppings. It’s so tempting to pile on the pepperoni and veggies, but heavy toppings weigh down the dough and prevent it from cooking evenly. Think of your pizza as a canvas; you want each ingredient to shine, not get lost in a mountain of cheese.
- Give your cheese a quick grate yourself. I know, I know, it’s an extra step, but pre-shredded cheese is coated in potato starch to prevent clumping, which means it won’t melt quite as beautifully. For that perfect, gooey stretch, grab a block of low-moisture mozzarella and do the work!
- Temperature control is your best friend. If you’re using fresh mozzarella, make sure to slice it and let it drain on a paper towel for a bit before putting it on the pizza. This prevents that “soupiness” in the middle of your pie that can ruin an otherwise perfect bake.
- Season your crust! Since I grew up in Vermont, I learned early on that even the simplest things need a little soul. A light dusting of cornmeal or semolina on your pizza peel helps the dough slide off easily, and a sprinkle of dried oregano or garlic powder directly on the crust edge adds a lovely aromatic touch.
My Golden Rules for Pizza Perfection
Don’t rush the dough; that slow fermentation is where the magic happens, turning simple flour and water into a complex, flavorful crust that’s worth every minute of the wait.
Treat your toppings like a canvas—less is almost always more when you’re aiming for that high-end, artisanal vibe where every single ingredient can actually shine.
Heat is your best friend, so whether you’re using a dedicated pizza oven or just cranking your home oven to its limit, getting that intense, direct heat is the secret to that perfect, bubbly char.
## The Heart of the Dough
“At the end of the day, a great pizza isn’t just about following a recipe; it’s about the patience you put into the ferment and the intuition you use when choosing your toppings. It’s that beautiful, messy bridge between culinary technique and pure, creative soul.”
Amelia Johnson
From Your Oven to the Soul

At the end of the day, mastering homemade pizza is about more than just getting a crispy crust or a tangy sauce; it’s about understanding the harmony between high-quality ingredients and patience. We’ve walked through the science of a long, slow fermentation to build that perfect dough structure and explored how a vibrant, homemade sauce can completely transform a basic pie into something extraordinary. Remember, while following a recipe is a great starting point, the real magic happens when you start to trust your instincts with toppings and seasoning. Whether you’re perfecting your heat management or experimenting with a drizzle of hot honey, every single pizza you pull from that oven is a testament to your growing culinary intuition.
As you wipe the flour off your apron and take that first, glorious bite, I want you to remember why we cook in the first place. Food is our most delicious way of connecting with the people we love and expressing who we are without saying a single word. Don’t be afraid to fail a few times or end up with a slightly charred crust—that’s just part of the beautiful, messy journey of becoming a cook. Keep experimenting, keep tasting, and most importantly, keep feeding your soul with every slice. You have all the tools you need to turn your kitchen into a sanctuary of creativity, so go out there and make something absolutely delicious!
Frequently Asked Questions
My crust is coming out really tough and cracker-like instead of chewy—what am I doing wrong?
Oh, I’ve been there! There is nothing more heartbreaking than expecting a pillowy, chewy crust and getting a literal cracker instead. Usually, this happens because of two things: hydration or heat. If your dough is too dry, it’ll lack that beautiful elasticity. Also, make sure your oven is screaming hot! You want that intense heat to create steam instantly, which gives you that airy, chewy interior we’re all dreaming of. Keep experimenting!
Can I use store-bought dough if I'm in a rush, or will that totally ruin the flavor profile?
Look, I get it—life happens, and sometimes you just need dinner on the table now. Can you use store-bought dough? Absolutely! It won’t “ruin” your meal, but it might lack that complex, bubbly soul of a long-fermented dough. If you’re in a rush, grab the freshest ball from the deli counter rather than the pre-packaged stuff. Just lean into high-quality toppings to make up for it. Even a quick pizza can be a culinary win!
I don't have a professional pizza stone in my kitchen; is there a way to get that perfect crispy bottom using just a regular baking sheet?
Don’t sweat the lack of a stone! I used to panic about this when I first started my own kitchen, but you can totally hack it. Flip a standard baking sheet upside down and preheat it in your oven—it acts as a makeshift hearth. For that extra crunch, try sliding your pizza onto a piece of parchment paper on top of that hot sheet. It’s a total game-changer for getting that golden, crispy crust!


Amelia Johnson
I believe that food is not just sustenance but an expression of culture and creativity. Let’s explore how we can turn our culinary passions into rewarding careers that feed both our souls and our wallets.