Creative Diy Planters Made From Things You Already Own
I remember standing in my grandmother’s sun-drenched kitchen in Vermont, watching her press a sprig of rosemary into a terracotta pot she’d cracked and glued back together herself. Back then, I thought she was just being frugal, but now, after years in high-pressure professional kitchens, I realize she was teaching me something much deeper. Most people think you need a massive budget or a degree in landscaping to grow your own herbs, but the truth is that diy planters are the ultimate secret weapon for any aspiring home chef. You don’t need fancy ceramic vessels from a boutique shop to cultivate a kitchen garden; you just need a little bit of grit and some creative vision.
In this guide, I’m stripping away the fluff and giving you the straight talk on how to build functional, beautiful vessels that actually work. We aren’t just making “craft projects” here; we are building the foundation for your future culinary adventures. I’ll walk you through selecting the right materials, ensuring proper drainage so your basil doesn’t drown, and how to upcycle everyday items into stunning, soul-feeding greenery. Let’s get our hands a little dirty and turn your windowsill into a flavor powerhouse.
Table of Contents
- Step-by-Step Instructions
- Upcycled Container Gardening Turning Waste Into Culinary Art
- Rustic Wooden Planter Builds for a Soulful Kitchen Garden
- Pro-Tips for Growing Your Own Culinary Sanctuary
- Planting the Seeds for Your Culinary Future
- More Than Just Dirt and Wood
- Bringing Your Vision to Life
- Frequently Asked Questions
Guide Overview
Tools & Supplies
- Drill and drill bit for drainage holes
- Measuring tape for sizing materials
- Scissors or utility knife for cutting
- Upcycled containers (tin cans, plastic bottles, or wooden crates)
- Potting soil (1 bag)
- Small pebbles or gravel (1 small bag)
- Decorative paint or twine (1 set)
Step-by-Step Instructions
- 1. First things first, you need to gather your supplies, and honestly, the fun starts right here. Grab some old tin cans (think tomato sauce or large coffee tins), a hammer, a thick nail, and some heavy-duty sandpaper. If you’re feeling a bit more adventurous, you can even repurpose old wooden crates or ceramic mugs that have seen better days. Just make sure whatever you choose is sturdy enough to hold both soil and water without losing its integrity.
- 2. Once you have your vessels, we need to talk about drainage—this is the non-negotiable part of the process. Flip your container upside down and use your hammer and nail to carefully tap a few holes into the bottom. If you skip this step, you’re basically creating a tiny, soggy swamp that will drown your precious herbs before they even have a chance to settle in.
- 3. Now, let’s give these containers a little personality! Since I’m a sucker for a good aesthetic, I love using matte spray paints or even some leftover acrylics to give my planters a custom look. You can go for a sleek, minimalist vibe or something colorful and eclectic that matches your kitchen’s energy. Just be sure to sand down any rough edges or sharp metal bits first so you don’t end up with a kitchen mishap while you’re working.
- 4. If you’ve gone with metal tins, I highly recommend adding a layer of sealant or a coat of outdoor-grade paint. This isn’t just about looks; it’s about protecting the material from the constant moisture of watering. Think of it like seasoning a cast-iron skillet—you’re building a protective barrier that ensures your planters last through many growing seasons.
- 5. It’s time for the “soul” of the project: the potting mix. Don’t just grab any old dirt from the backyard; you want a high-quality, well-draining potting soil that’s rich in organic matter. I like to mix in a little bit of perlite or vermiculite to keep things airy. When you’re filling your new planters, leave about an inch of space at the top so you have room for watering without causing a muddy overflow.
- 6. Finally, the moment of truth! Gently nestle your seedlings—maybe some fragrant basil, mint, or even a spicy chili pepper—into their new homes. Press the soil down lightly around the base of the plant to remove large air pockets, but don’t pack it so tight that the roots can’t breathe. Give them a gentle initial soak, find a sunny windowsill, and watch your culinary garden come to life!
Upcycled Container Gardening Turning Waste Into Culinary Art
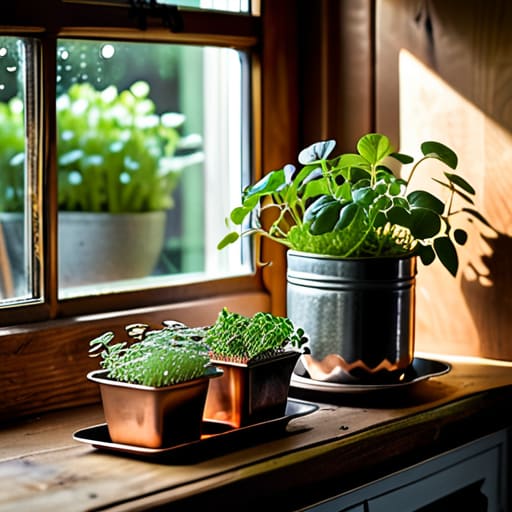
Now, if you’re looking to save a few bucks while giving your kitchen a little extra character, let’s talk about the magic of upcycled container gardening. Honestly, some of my favorite culinary inspirations come from the most unexpected places. I’ve seen chefs transform vintage tea tins or even old colanders into stunning vessels for microgreens. If you’re feeling a bit more crafty, you can easily whip up some recycled plastic bottle planters to house your windowsill basil or mint. It’s not just about being eco-friendly; it’s about giving a second life to objects that would otherwise end up in a landfill, turning “trash” into a functional piece of your kitchen’s soul.
Don’t feel like you need a massive backyard to make this happen, either. If you’re working with limited real estate, I highly recommend looking into hanging planter tutorials to utilize that vertical space above your prep area. Whether you’re repurposing a weathered wooden crate for a rustic vibe or using old mason jars, the goal is to create an environment that feels uniquely yours. Remember, a garden doesn’t need a fancy price tag to be beautiful—it just needs a little bit of your heart and a lot of creativity.
Rustic Wooden Planter Builds for a Soulful Kitchen Garden
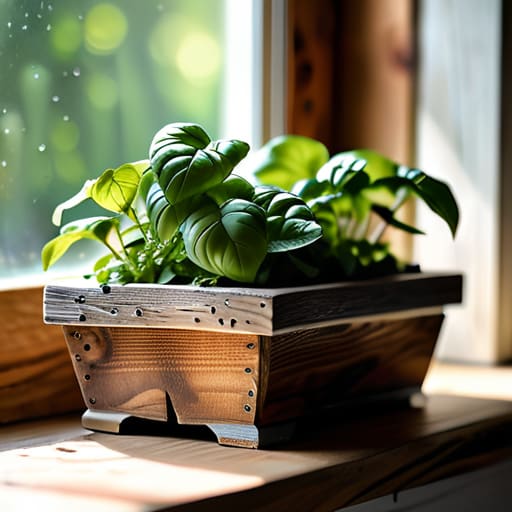
There is something deeply grounding about bringing a touch of the outdoors inside, especially when it feels like it was pulled straight from a farmhouse in my childhood Vermont. When you dive into rustic wooden planter builds, you aren’t just making a home for your basil; you’re adding a layer of warmth and texture that plastic simply can’t replicate. I love using reclaimed cedar or even old wine crates to create these vessels. The key is to ensure you line them with a bit of landscape fabric first—this protects the wood from moisture while letting those precious roots breathe.
If you’re working with a smaller kitchen footprint, don’t feel limited to the countertop. You can easily transition these wooden aesthetics into hanging planter tutorials by adding some sturdy jute rope or vintage iron hooks. This vertical approach is a total game-changer for an indoor herb garden diy project, allowing you to grow a lush, aromatic canopy right above your prep station. It’s about creating a space that feels intentional, soulful, and—most importantly—ready for your next culinary masterpiece.
Pro-Tips for Growing Your Own Culinary Sanctuary
- Think about drainage before you think about aesthetics; even the most beautiful hand-painted pot will turn your precious basil into a soggy mess if there’s nowhere for the excess water to escape.
- Size matters more than you think, so choose a vessel that gives your herbs enough “elbow room” to stretch their roots without feeling cramped or stunted.
- Don’t skimp on the soul of the project—the soil—because even the most stunning DIY planter won’t do much good if you aren’t feeding your plants high-quality, nutrient-dense organic potting mix.
- Location is everything, so make sure your new little garden setup gets at least six hours of that glorious sunlight; otherwise, you’ll end up with leggy plants that lack that punchy flavor we crave.
- Mix it up with textures to keep things interesting, layering terracotta, reclaimed wood, and even smooth ceramics to create a visual feast that complements your kitchen’s unique vibe.
Planting the Seeds for Your Culinary Future
Remember that your kitchen garden is a living extension of your creativity; don’t be afraid to let your planters reflect your unique personal style.
Upcycling isn’t just about saving a few bucks—it’s about finding the hidden potential in everyday objects to create something truly soulful and sustainable.
Whether you’re building from reclaimed wood or an old tin can, the goal is to create a nurturing space that fuels both your cooking and your passion.
More Than Just Dirt and Wood
“Don’t think of these DIY planters as just another chore on your weekend to-do list; think of them as the soulful vessels that allow your culinary creativity to bloom right on your windowsill, turning a simple scrap of wood or an old tin into the very foundation of your future signature dish.”
Amelia Johnson
Bringing Your Vision to Life
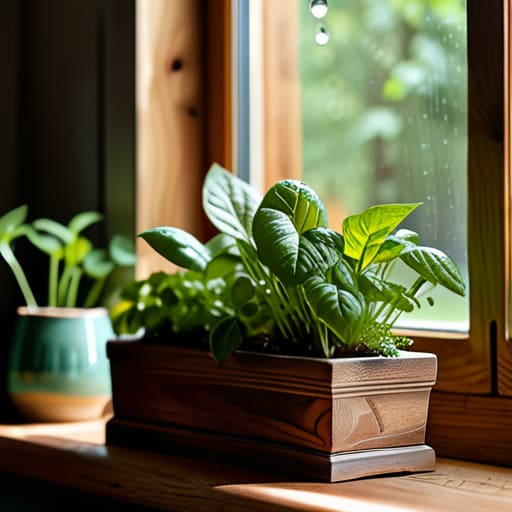
Whether you decided to dive into the charm of upcycled containers or felt inspired to hammer together some rustic wooden builds, you’ve done more than just make some pots. You’ve laid the foundation for a living, breathing pantry right in your own home. From breathing new life into old kitchen scraps to crafting bespoke vessels that match your kitchen’s unique aesthetic, the journey of creating your own DIY planters is all about intentionality. By building these habitats yourself, you aren’t just saving a few bucks; you are actively curating a space where your future ingredients can thrive under your very own care.
As you move from the sawdust and soil into the actual joy of harvesting, I want you to remember that every great chef started with the basics. There will be learning curves, sure—maybe a seedling won’t make it, or a planter might leak a little—but that’s all part of the beautiful, messy process of creation. Don’t be afraid to experiment, get your hands dirty, and trust your culinary intuition. You are building more than a garden; you are cultivating a lifestyle that celebrates growth, sustainability, and the pure magic of farm-to-table living. Now, go grab your trowel and let’s get growing!
Frequently Asked Questions
Will these DIY planters affect the drainage and health of my delicate culinary herbs?
That is such a brilliant question! Honestly, it’s the one thing that keeps me up at night when I’m designing new setups. If you don’t get the drainage right, those delicate basil or mint roots will basically be swimming in a swamp, and nobody wants a soggy herb garden. Just make sure you drill a few extra holes in the bottom and maybe toss in some coarse gravel. Think of it as giving your herbs a little breathing room to thrive!
What kind of soil mix should I use to ensure my windowsill garden actually thrives instead of just looking pretty?
Listen, I’ve seen so many beautiful windowsill setups turn into little graveyards because of heavy, garden soil. For your indoor herb garden to truly thrive, you need a high-quality, well-draining potting mix. I love a blend of peat moss or coconut coir, perlite, and a bit of compost for that nutrient punch. It keeps things airy so those roots can breathe—because a happy root system is the secret ingredient to flavorful, vibrant herbs!
How can I prevent my upcycled containers from leaking or staining my kitchen counters?
Oh, the struggle of the beautiful but messy upcycled vessel! I’ve definitely had a few vintage tins leave a ring on my favorite marble countertop. To keep your counters pristine, I always recommend a double layer of cork coasters or even a slim silicone mat underneath. If you’re using porous materials like terracotta, a quick coat of food-safe sealant works wonders. Think of it as giving your planters a little protective apron!


Amelia Johnson
I believe that food is not just sustenance but an expression of culture and creativity. Let’s explore how we can turn our culinary passions into rewarding careers that feed both our souls and our wallets.