How to Build Floating Shelves That Hold Real Weight
I remember standing in my very first tiny apartment kitchen in NYC, staring at a cluttered countertop that was absolutely suffocating my favorite copper pots and that hand-thrown ceramic jar my grandmother gave me. I was convinced that I needed a professional contractor and a massive budget to reclaim my space, but here’s the truth: you don’t need a construction crew to create a functional masterpiece. Tackling a floating shelves diy project isn’t about having a workshop full of heavy machinery; it’s about finding the right rhythm and a few sturdy brackets to let your kitchen truly breathe.
In this guide, I’m stripping away the intimidation factor and giving you the straight-up, no-nonsense blueprint for success. We’re going to walk through everything from selecting wood that actually complements your vibe to the secret of leveling so your spice collection doesn’t end up in a heap on the floor. Whether you’re looking to display your heirloom Le Creuset or just want a stylish home for your daily espresso mugs, I’ll show you how to execute a floating shelves diy that looks professionally curated without the professional price tag.
Table of Contents
- Step-by-Step Instructions
- Curating Modern Floating Shelf Design With Soul
- The Essential Woodworking Tools for Shelving Success
- Pro Tips from My Kitchen to Yours: Making Your Shelves Truly Shine
- Bringing It All Together: My Final Kitchen Wisdom
- ## More Than Just Wood and Brackets
- From Raw Wood to Kitchen Soul
- Frequently Asked Questions
Guide Overview
Tools & Supplies
- Drill/Driver for mounting brackets and screws
- Level to ensure shelves are straight
- Saw for cutting wood to length
- Stud finder to locate wall supports
- Sandpaper for smoothing edges
- Wood planks (2-3 pieces)
- Floating shelf brackets (1 set per shelf)
- Wall anchors or heavy-duty screws
- Wood stain or paint
- Wood glue
Step-by-Step Instructions
- 1. First things first, we need to gather our supplies. You can’t cook a five-star meal without the right mise en place, and the same goes for woodworking! Grab some high-quality wood (I’m a huge fan of reclaimed oak for that rustic Vermont feel), a drill, some sturdy wall anchors, a level, a measuring tape, and your sandpaper. Don’t forget a stain or oil that speaks to your personal style—whether that’s a deep espresso or a light, breezy honey tone.
- 2. Once you have your wood, it’s time to prep the surface. This is where the magic happens. Use your sandpaper to smooth out any rough edges or splinters. You want the wood to feel as silky smooth as a well-emulsified beurre blanc. Start with a coarser grit and work your way up to a fine grit to ensure you don’t leave any nasty scratches behind.
- 3. Now, let’s talk about the “floating” part of the magic. You’ll need to decide if you’re using hidden brackets or a cleat system. If you’re a beginner, I highly recommend the cleat method. You’ll screw a strip of wood directly into your wall studs, and then your main shelf will slide right over the top of it. It’s incredibly sturdy—perfect for those heavy ceramic bowls you’ve been collecting!
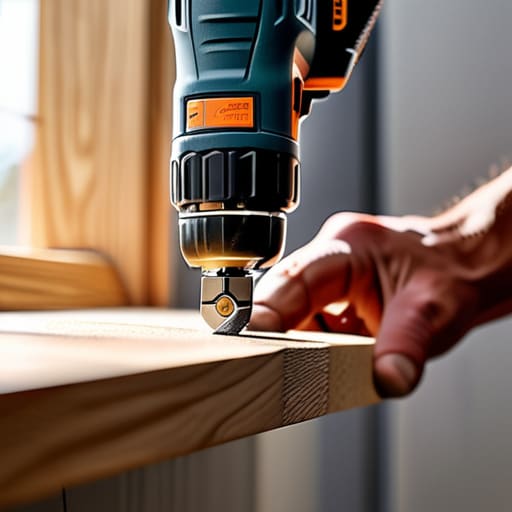
- 4. Before you start drilling any permanent holes, grab that level. I cannot stress this enough: measure twice, drill once. If your shelves are even a tiny bit crooked, it’s going to drive your inner perfectionist crazy every time you look at them. Mark your stud locations clearly with a pencil so you know exactly where that structural support is going to live.
- 5. It’s time to secure the supports to the wall. Drill your pilot holes into the studs (or use heavy-duty anchors if you’re hitting a gap between them) and screw your cleat or bracket into place. Make sure everything is rock solid before moving on. You don’t want your precious collection of spices or hand-thrown mugs taking a tumble because of a loose screw!
- 6. Now for the fun part: applying the finish. This is where you give your shelf its unique personality. Apply your stain or wood oil with a lint-free cloth, following the natural grain of the wood. It’s a bit like seasoning a cast-iron skillet—you want to build up the layers slowly to get that rich, professional look that makes a kitchen feel truly curated.
- 7. Finally, once the finish is completely dry and cured, slide your shelf onto the wall supports. Give it a little nudge to make sure it’s seated snugly. Now, go ahead and style it! Arrange your cookbooks, a few trailing plants, and perhaps a small jar of sea salt. This isn’t just a shelf; it’s a canvas for your culinary life.
Curating Modern Floating Shelf Design With Soul

Now that you’ve conquered the technical side of the build, let’s talk about the fun part: making these shelves actually look like they belong in a designer kitchen rather than a hardware store aisle. To achieve a truly modern floating shelf design, I always recommend leaning into the “less is more” philosophy. Instead of cluttering the space with every gadget you own, select a few hero pieces—maybe a beautiful marble mortar and pestle or a collection of vintage copper measuring spoons. This creates visual breathing room and allows your most meaningful items to really pop.
When you’re styling, think about layers and textures to avoid that flat, sterile look. I love mixing organic elements, like a trailing pothos plant, with the clean lines of your timber. However, don’t let your aesthetic ambitions override safety! Always keep shelf weight capacity tips in mind; there is nothing more heartbreaking than a beautiful display crashing down because you overstuffed it with heavy stoneware. If you’re planning on displaying a full set of ceramic plates, ensure you were meticulous about mounting shelves to studs during your installation. Balance beauty with structural integrity, and your kitchen will feel like a curated sanctuary.
The Essential Woodworking Tools for Shelving Success

Before we dive into the sawdust, let’s talk gear. You don’t need a professional workshop to pull this off, but having the right woodworking tools for shelving makes the difference between a professional finish and a frustrating afternoon. I always recommend starting with a solid drill and a level—because nothing kills the vibe of a beautiful kitchen faster than a crooked shelf holding your favorite heirloom ceramics. If you’re aiming for that seamless, high-end look, you’ll also want to invest in a decent miter saw to ensure your cuts are crisp and clean.
Now, here is where the real magic (and the heavy lifting) happens. To ensure your display can actually handle the weight of those heavy cookbooks or stoneware pitchers, you absolutely must focus on mounting shelves to studs. I can’t stress this enough! If you skip the stud finder, you’re essentially playing culinary roulette with your decor. If your layout doesn’t align perfectly with your wall studs, don’t panic—that’s exactly when you’ll want to lean into using heavy-duty hidden shelf brackets to provide that much-needed structural integrity without sacrificing that sleek, modern aesthetic we’re all chasing.
Pro Tips from My Kitchen to Yours: Making Your Shelves Truly Shine
- Don’t skimp on the anchors; even the most beautiful shelf becomes a heartbreak if your favorite hand-thrown ceramic bowls end up in pieces on the floor because of a weak wall mount.
- Think about the “weight” of your story—mix heavy, heirloom cast iron with lighter, airy greenery to create a visual rhythm that feels lived-in rather than staged.
- Sanding is your best friend for a professional finish, so take that extra twenty minutes to get the wood feeling as smooth as silk before you apply your oils or stains.
- Use your shelves as a stage for your spices; grouping your prettiest jars together not only looks stunning but makes that mid-recipe dash for smoked paprika a total breeze.
- Leave some breathing room between your items; a shelf that’s too crowded loses its magic, so give your culinary treasures a little space to actually tell their story.
Bringing It All Together: My Final Kitchen Wisdom
Treat your shelves like a curated pantry; don’t just store things, display the pieces—like those heirloom spices or hand-painted ceramics—that actually spark joy when you walk into the room.
Don’t let the fear of a crooked line stop you; precision matters for safety, but a little bit of character is what makes a DIY project feel like a home rather than a showroom.
Think beyond the wood and nails by remembering that these shelves are a canvas for your culinary personality, helping you bridge the gap between a functional workspace and a soulful sanctuary.
## More Than Just Wood and Brackets
“When you’re building your own floating shelves, you aren’t just creating storage; you’re building a stage for the things you love—the mismatched heirloom ceramics, the spice jars that tell your travel stories, and the tools that make your kitchen feel alive. It’s about turning a blank wall into a reflection of your own creative soul.”
Amelia Johnson
From Raw Wood to Kitchen Soul

Now that you’ve navigated the sawdust and the measurements, take a moment to look at what you’ve actually built. You didn’t just assemble some lumber; you mastered the essential tools, followed the structural steps, and most importantly, you applied a sense of intentional design to your space. Whether you opted for heavy reclaimed oak to hold your cast iron collection or a sleek, minimalist pine for your herb garden, you’ve successfully bridged the gap between a simple DIY project and a curated culinary sanctuary. Remember, the secret isn’t in the perfect level or the seamless joinery, but in how these shelves allow your kitchen to finally breathe and reflect who you are.
As you start arranging your favorite hand-thrown ceramics and those precious spice jars I’m always obsessing over, I want you to remember something important. This project is a testament to your ability to create something beautiful from scratch. In the high-pressure world of professional kitchens, we often forget that the most rewarding meals—and the most meaningful spaces—are the ones we build with our own two hands. Don’t be afraid to let your shelves be a bit imperfectly beautiful. Use them as a canvas for your creativity, and let your kitchen become a place that truly feeds your soul every single day.
Frequently Asked Questions
How do I make sure these shelves can actually hold my heavy Le Creuset pots without sagging or pulling out of the wall?
Oh, the Le Creuset question! I love it—those Dutch ovens are basically the heavyweights of the kitchen. To keep your shelves from bowing or, heaven forbid, crashing down, you absolutely cannot rely on those tiny little hidden brackets. You need to anchor your supports directly into the wall studs using heavy-duty lag bolts. If your layout doesn’t line up with the studs, use high-quality toggle bolts. Trust me, your cast iron (and your toes) will thank you!
Should I go for a dark, moody walnut stain to match my kitchen's vibe, or keep it light and airy with a natural finish?
Oh, the classic design dilemma! Honestly, it depends on the “flavor” of your kitchen. If you’re aiming for that cozy, bistro-style intimacy, a moody walnut stain is absolute magic—it adds instant depth and sophistication. But, if your space feels a bit tight or you want that bright, farmhouse-chic energy, stick with a natural finish. Personally? I love a dark wood to make colorful spice jars and ceramic bowls really pop!
I'm worried about the "floating" look being too clinical—how can I style them so they feel cozy and lived-in rather than just a display for dust?
Oh, I hear you! A sterile, “showroom” kitchen is the fastest way to kill the vibe. To avoid that clinical feel, think of your shelves as a living autobiography. Instead of perfect symmetry, try grouping mismatched textures—think a weathered wooden cutting board next to a stack of well-loved linen napkins. Toss in a trailing pothos plant for some life, and don’t be afraid to display those slightly chipped heirloom mugs. It’s all about the layers, babe!


Amelia Johnson
I believe that food is not just sustenance but an expression of culture and creativity. Let’s explore how we can turn our culinary passions into rewarding careers that feed both our souls and our wallets.