How to Build a Garden Trellis for Climbing Plants
I remember standing in my grandmother’s garden back in Vermont, watching her struggle with a flimsy piece of chicken wire that collapsed the second her heavy heirloom tomatoes started to ripen. It was a heartbreaking sight—delicious, sun-warmed fruit crushed under the weight of its own potential. Most people think you need a degree in architecture or a massive budget at a hardware store to create something sturdy, but that’s a total myth. Learning how to build a garden trellis is actually much more about understanding the rhythm of your plants than it is about complex engineering.
In this guide, I’m stripping away the fluff and giving you the same no-nonsense, practical approach I use when designing edible landscapes for my clients. I’ll walk you through selecting the right materials, ensuring structural integrity, and designing a setup that looks like a piece of art rather than an eyesore. We aren’t just building a support system; we are creating a vertical stage for your culinary herbs and climbing veggies to perform. Let’s get your hands a little dirty and build something that actually lasts.
Table of Contents
- Step-by-Step Instructions
- Curating Your Garden Trellis Materials List
- Creative Wooden Trellis Design Ideas for Vertical Gardening Solutions
- Pro-Tips from the Kitchen Garden: Making Your Trellis Work as Hard as You Do
- Final Flavors: Bringing Your Vertical Garden to Life
- Elevating Your Edible Garden
- From Blueprint to Bounty
- Frequently Asked Questions
Guide Overview
Tools & Supplies
- Measuring tape for accurate wood cuts
- Handsaw or miter saw for cutting lumber
- Drill with bits for creating pilot holes
- Screwdriver or drill driver for fastening
- Cedar or pressure-treated wood slats (4-6 pieces)
- Wooden stakes or garden posts (2-4 pieces)
- Exterior grade screws (1 box)
- Wire or twine (1 roll)
Step-by-Step Instructions
- 1. Before we get our hands dirty, we need to gather our “mise en place.” Just like prepping a complex reduction, you don’t want to be hunting for a screwdriver mid-build. Grab some sturdy wooden stakes or cedar 2x2s, some heavy-duty twine (jute is my favorite for that rustic look), a drill, some galvanized screws, and a pair of garden shears. Having everything laid out on your workbench or garden table ensures the process is smooth and stress-free.
- 2. Start by deciding on the “architecture” of your trellis. Are you looking for a classic A-frame to support heavy heirloom tomatoes, or perhaps a simple vertical ladder for delicate pea shoots? Once you’ve picked your design, measure out your wooden stakes. If you’re building a standard ladder style, you’ll want two long vertical poles and several shorter horizontal rungs. I always suggest choosing untreated cedar because it stands up to the elements without leaching chemicals into your soil.
- 3. Now, let’s get to the assembly. Lay your long vertical poles on a flat surface and mark where you want your horizontal rungs to sit. I like to space mine about 12 to 18 inches apart, depending on how much room to breathe the plants will need as they climb. Use your drill to pre-drill small pilot holes—this is a pro tip to prevent your wood from splitting—and then secure the rungs to the poles using your galvanized screws.
- 4. It’s time to move from the workbench to the garden bed. To ensure your trellis doesn’t take a tumble during a summer thunderstorm, you need to secure the base. Dig two small holes about 8 to 12 inches deep where your vertical poles will sit. Gently slide the trellis into place and pack the soil firmly around the base. If you’re dealing with particularly heavy climbers like squash, I highly recommend using extra-long garden stakes driven into the ground alongside the trellis for added stability.
- 5. Once your structure is standing tall, we need to add the “connective tissue.” Take your jute twine and wrap it in a zigzag pattern across the rungs, creating a web of support. This gives your climbing vines a textured surface to grab onto. Don’t make it too tight; you want to leave enough flexibility for growth so the plants can weave themselves naturally through the grid.
- 6. Finally, let’s get your edible stars in the ground! Plant your climbers at the base of your new trellis, making sure to give them a little mound of high-quality compost for an initial nutrient boost. As they begin to sprout, you can gently guide the young tendrils toward the twine. Watching those first little green shoots reach for the structure is honestly one of the most rewarding parts of gardening.
Curating Your Garden Trellis Materials List
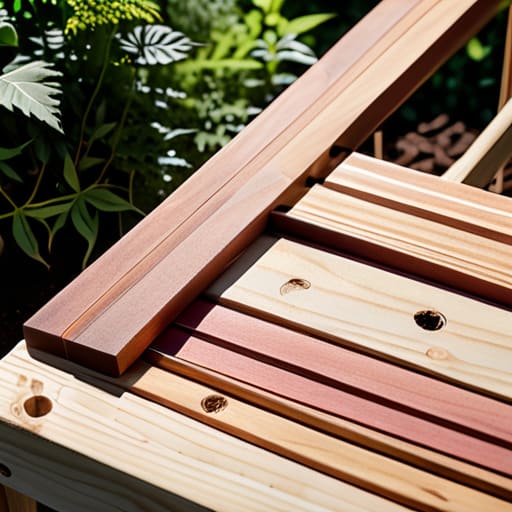
Before you dive into the actual construction, let’s talk about the “mise en place” of your garden project. Just like I wouldn’t step into a professional kitchen without my knives sharpened and my ingredients prepped, you shouldn’t start building without a solid garden trellis materials list in hand. I always tell my clients that the secret to a structure that lasts isn’t just the assembly; it’s the quality of the components. If you’re planning on growing heavy hitters like heirloom tomatoes or vigorous squash, you’ll want to opt for sturdier, weather-resistant wood like cedar or redwood. These materials offer incredible longevity without the constant need for chemical treatments that might leach into your soil.
As you gather your supplies, keep your end goal in mind. Are you looking for something purely functional, or are you dreaming up some elaborate wooden trellis design ideas that double as living art for your backyard? Think about the weight of your future harvest. If you’re leaning into vertical gardening solutions to save space, you might need more heavy-duty hardware or thicker stakes to ensure everything stays upright when the summer heat hits. Choosing the right materials now means you won’t be frantically patching up a sagging structure mid-season!
Creative Wooden Trellis Design Ideas for Vertical Gardening Solutions
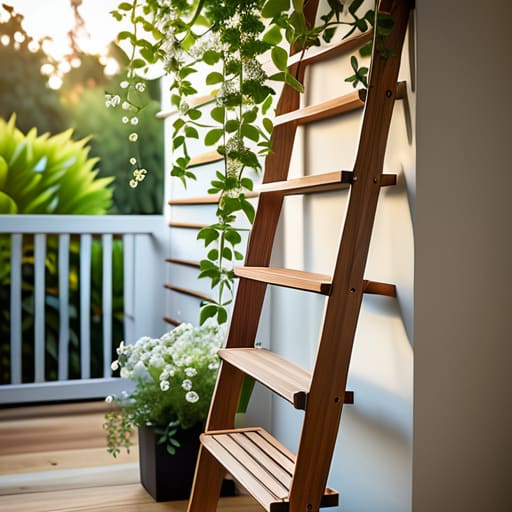
Once you’ve checked off everything on your garden trellis materials list, the real magic begins: deciding on the aesthetic. I always tell my clients that your trellis shouldn’t just be a functional tool; it should be a piece of living art. If you’re working with a smaller patio or a balcony, consider a minimalist ladder style using slim cedar slats. This provides sleek vertical gardening solutions that don’t overwhelm the space but offer plenty of surface area for delicate peas or jasmine to wrap around.
For those of you with a bit more room to play, why not lean into something more rustic? An arched wooden trellis creates a stunning entryway that feels like stepping into a secret garden. It’s one of those easy DIY garden structures that completely transforms the flow of your backyard. If you want to get really adventurous, try an asymmetrical lattice design. It breaks up the rigid lines of a traditional garden and gives your climbing plants a more organic, sculptural path to follow. Remember, your garden is your canvas—don’t be afraid to let your creativity run wild!
Pro-Tips from the Kitchen Garden: Making Your Trellis Work as Hard as You Do
- Think about your harvest weight before you hammer a single nail; if you’re planning on growing heavy-hitting heavyweights like heirloom tomatoes or even some vigorous squash, your trellis needs to be a sturdy fortress, not a flimsy afterthought.
- Location is everything when it comes to your vertical garden, so make sure you’re placing your trellis where your climbing beauties will get that glorious, uninterrupted sunlight they need to fuel their growth.
- Don’t forget to plan for “breathing room” by spacing your trellis slightly away from walls or fences; giving your plants a little bit of airflow is the secret ingredient to preventing mold and keeping your harvest healthy and vibrant.
- I always say, treat your trellis like a seasoning—it should enhance, not overwhelm—so choose a design that complements the natural aesthetic of your garden rather than clashing with it.
- Be prepared to play the role of a gentle mentor by training your vines early on; using soft twine to guide those young, eager shoots upward will ensure they grow with purpose and strength from day one.
Final Flavors: Bringing Your Vertical Garden to Life
Think of your trellis as more than just a structure; it’s a custom-built stage designed to showcase the edible stars of your garden, from climbing peas to fragrant jasmine.
Don’t be afraid to get a little experimental with your materials, because the best designs are the ones that blend structural sturdiness with your own unique creative flair.
Remember that a successful vertical garden is all about balance—ensure your trellis is as strong as it is beautiful so it can support the weight of your culinary dreams as they grow.
Elevating Your Edible Garden
“Think of a trellis not just as a piece of garden hardware, but as the stage where your climbing herbs and heirloom tomatoes finally get their moment to shine; it’s about giving your ingredients the structure they need to reach their full, delicious potential.”
Amelia Johnson
From Blueprint to Bounty
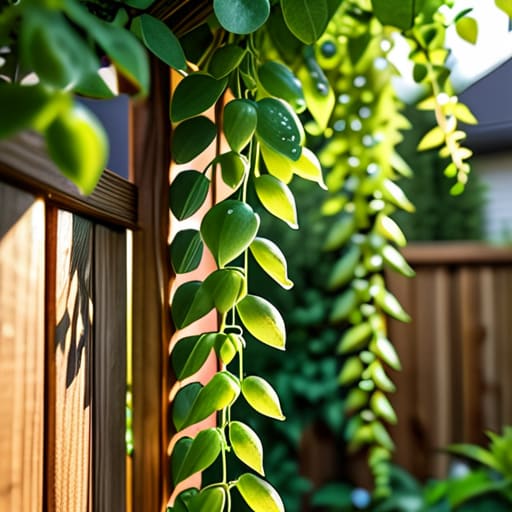
Building your own trellis is so much more than just a weekend DIY project; it’s about setting the stage for your garden’s most dramatic performance. By carefully selecting your materials—whether you went with sturdy cedar or something more rustic—and choosing a design that complements your space, you’ve essentially built a vertical stage for your culinary stars. You’ve moved past the basic planning stages and into the actual execution, ensuring that your climbing peas, cucumbers, or fragrant jasmine have the structural support they need to thrive. Remember, a well-constructed trellis doesn’t just save space; it creates an organized, beautiful environment where your plants can truly reach their full potential.
As you step back to look at your handiwork, I want you to realize that you’ve just created something that will feed both your eyes and your appetite for seasons to come. There is a unique kind of magic in watching a tiny seedling wrap its delicate tendrils around a structure you built with your own two hands. Whether you’re growing heirloom tomatoes for a summer sauce or just want a lush green backdrop for your patio, let this be a reminder that creativity knows no bounds when we work with nature. So, grab your gardening gloves, get a little dirt under your fingernails, and get ready to watch your hard work blossom into something absolutely delicious!
Frequently Asked Questions
How do I know if the trellis I've built is strong enough to support heavy, fast-growing climbers like pole beans or even small squash?
That is such a fantastic question! I’ve seen many a beautiful garden project get brought down by a heavy harvest. Think of it this way: if you’re planting heavy hitters like squash, your trellis needs to be more than just a pretty face—it needs real structural integrity. Give it the “shake test.” If it wobbles significantly when you nudge it, it won’t handle those juicy, heavy vines. For those big climbers, I always recommend extra bracing or even anchoring your supports deep into the soil.
What are the best ways to secure my new trellis to the ground or a wall so it doesn't topple over during a summer thunderstorm?
Nothing ruins a culinary dream faster than a sudden summer storm flattening your hard work! To keep your trellis standing tall, I recommend driving heavy-duty wooden or metal stakes deep into the ground at the base. If you’re mounting it to a wall, use sturdy masonry anchors to ensure it can handle the weight of heavy vines. For extra insurance, some heavy-duty guy wires can act like a safety net against those unexpected gusts!
Since I'm planning on growing edible herbs and veggies, should I use a specific type of wood treatment to make sure nothing toxic leaches into my soil?
That is such a brilliant question! When you’re growing things you actually plan to eat, you definitely want to avoid anything with heavy metals or harsh chemicals. Skip the pressure-treated lumber—it can leach toxins into your soil. Instead, I always recommend using cedar, redwood, or cypress. They’re naturally rot-resistant, which is a lifesaver for outdoor structures, and most importantly, they’re totally food-safe. Your herbs will thank you!


Amelia Johnson
I believe that food is not just sustenance but an expression of culture and creativity. Let’s explore how we can turn our culinary passions into rewarding careers that feed both our souls and our wallets.